

Every question answered, every surface covered. From driveways and patios to pool surrounds and zoning paths – here’s what you need to know before making your next step barefoot.

General Landscaping & Resin Related FAQs
Explore common questions about resin surfacing, installation, maintenance and design tips, ideal if you’re starting your resin research journey.
Local Area Resin Surfacing FAQs
From Kensington mews courtyards to Walthamstow garden paths, this section covers hyper-local resin questions, styling ideas and surfacing quirks shaped by the way London homes are designed and lived in.
Everything Homeowners Want to Know About Stone Resin, Resin Driveways and Premium Resin Outdoor Surfaces
These FAQs clarify the questions homeowners ask most often when exploring stone resin, resin driveways, and modern resin surfacing. Choosing a new surface is rarely about materials alone. It’s about kerb appeal, durability, ease, confidence and wanting your home to feel calm, organised and beautifully finished. Stone resin is known for transforming tired spaces into clean, contemporary entrances with strong visual impact and low maintenance. Whether you’re planning a resin driveway, an entrance pathway or a full garden upgrade, the right information makes each decision easier. For reassurance on broader landscape design standards, the Landscape Institute offers independent insight into best practice for outdoor environments.
Type a word or phrase to search these FAQs.
General Resin Surfacing FAQs
What is resin and stone surfacing and how does it work?
Resin and stone surfacing, often called a resin-bound system, is a high-performance way to upgrade driveways, patios, paths and entrances. Clean, kiln-dried decorative stone is blended with a clear, UV-stable polyurethane resin, then trowelled by hand onto a structurally sound base to create a seamless, stone-rich surface that is both strong and permeable.
Unlike older “epoxy resin” systems that can be brittle and prone to yellowing in sunlight, modern polyurethane resin bound gravel is flexible enough to cope with normal thermal movement and everyday traffic. When installed over a suitable permeable base, it forms part of a SuDS-aware drainage strategy, helping water soak away instead of running straight into the road.
| Feature | What it means for your home |
|---|---|
| Permeable surface layer | Helps water drain through the surface, reducing puddles and surface water run off. |
| Seamless finish | No loose stones, fewer trip hazards, easier access for prams, buggies and mobility aids. |
| High stone content | A natural, premium look that can complement both modern and traditional properties. |
| UV-stable resin | Helps protect against yellowing and patchy colour fade in direct sunlight. |
For a step-by-step breakdown of the base build, mixing ratios and application process, see Resin Installation Process.
If you would like to compare colours, textures and edging details, take a look at the Cherry Home Improvements project gallery and the Homeowner Resources and free downloads.
How does resin-bound compare to resin-bonded gravel?
The two names sound similar but resin bound and resin bonded are very different systems. The choice affects drainage, planning permission, comfort underfoot and how long the surface is likely to last.
| Feature | Resin bound | Resin bonded |
|---|---|---|
| How it is laid | Stone and resin fully mixed, then trowelled to form a smooth, fully bound layer. | Resin painted on, loose stone scattered onto the surface and left to stick. |
| Permeability | Permeable surface when laid over a suitable base, supports SuDS style drainage. | Non permeable surface, usually needs separate drainage provisions. |
| Comfort and use | Smooth, ideal for driveways, entrances, patios and wheelchair access. | Rougher, better suited to decorative or low traffic areas. |
| Loose stone risk | Stones are locked in place, minimal scatter under tyres or heels. | Can shed stone over time, especially under braking or turning vehicles. |
For most homes that want a resin bound driveway, path or patio that is easy to live with, resin bound is usually the better long-term choice. Resin bonded can work for lighter use where extra texture is needed, but it will not give the same drainage or comfort underfoot.
If you would like to dive deeper, there is a dedicated guide on Resin Bound vs Resin Bonded gravel plus a growing library of articles in the Resin Knowledge Hub.
Is epoxy resin used in outdoor surfacing?
Epoxy resins are excellent for indoor floors and industrial coatings, but they are rarely the right choice for a British driveway or patio. They are typically stiffer and less UV-stable than the aliphatic polyurethane binders used in modern resin bound systems.
Outdoor surfaces must cope with:
- Direct sunlight and UV exposure
- Temperature swings across the seasons
- Surface movement in the base below
- Tyre scuffing, turning and braking forces
For this reason, UV-stable polyurethane resin is used for external resin bound surfacing, combined with carefully graded, kiln-dried aggregates. This combination has been shown in UK case studies and manufacturer testing to offer lifespans of 15 to 25 years when the base is built correctly and the surface is maintained sensibly.
If you are comparing technical data, you can download base build and application notes from the Base Build & Application Data Sheets, and browse further technical background in the Technical Info & Downloads.
What does outdoor resin flooring feel like and is it durable?
A resin bound surface feels like a smooth, stone-rich carpet underfoot. The aggregates are locked together so there are no sharp loose stones, but the natural texture still provides grip. This makes it ideal for driveways, entrance paths, patios, pool surrounds and spa areas.
When installed to manufacturer specifications over the correct base, industry data and installer case studies show that resin bound driveways regularly achieve lifespans in the region of 15 to 25 years with basic maintenance. During that time the surface will usually require far less weeding, re-sanding or cleaning than many traditional options.
For inspiration on where it can be used, explore:
- Patios & Pathways
- Pool & Garden Spaces
- ResinVision™ Studio to see your design before installation
Detailed aftercare advice, cleaning tips and colour care guides can be downloaded from the Aftercare, Colour & Photo Guides.
Can I apply resin over an existing surface like concrete, tarmac or paving?
In many cases, yes. A resin overlay can be installed over existing concrete, tarmac and some other hard surfaces, but only if the base is structurally sound, free of significant movement and has suitable drainage. The surface you have today will strongly influence the cost, preparation and lifespan of the finished resin bound surface.
| Existing surface | When an overlay may work | When a full base rebuild is better |
|---|---|---|
| Concrete | Slab is sound, minimal cracking, no obvious rocking or subsidence, water is draining away correctly. | Widespread cracking, hollow or lifted areas, standing water, poor falls, or previous overlays failing. |
| Tarmac / asphalt | Stable, no soft spots or deformation from parked vehicles, edges well contained. | Rutting, soft spots, crumbling edges, evidence of base movement or repeated patch repairs. |
| Block paving | Blocks are firm, no rocking, no major dips or heave, joints re-stabilised and sand removed. | Movement, severe rutting in tyre tracks, poor base build, drainage issues or sinking manholes. |
| Slabs / flags | Small, well bedded flags on a proper sub-base in light use areas such as paths or terraces. | Large paving flags spot-bedded on soft ground, rocking underfoot, or laid directly on soil. |
As a broad guide, overlays on sound existing hardstanding will usually sit toward the lower end of our pricing, starting from around £80 per m² for straightforward residential projects, whereas full excavation, new sub-base and a new permeable build-up for heavy vehicles can reach £140+ per m². The final figure depends on access, drainage corrections, spoil removal and design choices such as borders and patterns.
Typical timescales range from 1 to 2 days for small overlays to 3 to 5 days or more for full dig-outs and complex layouts. Weather, curing time and site conditions will all affect the final schedule.
To understand exactly what your surface needs, booking a Resin Surfacing Assessment is recommended. You can also review base build options in more detail in the Base Build & Application Data Sheets and wider articles in the Help & Advice Knowledge Hub.
What is “easy-hold resin” and when is it used?
“Easy-hold resin” is a friendly nickname for resin bound surfacing with extra slip resistance. The performance comes from microscopic grip additives such as crushed glass or specialist grit that are broadcast onto the fresh resin bound surface then locked in as it cures.
This style of finish is typically recommended for:
- Steps, ramps and sloping access routes
- Outdoor kitchens and entertaining terraces
- Pathways in shaded or occasionally damp areas
- Commercial entrances with regular foot traffic
Because the additive is tumbled and fine, it provides traction without making the surface look or feel like sandpaper. The result is a resin bound surface that still looks sleek but provides extra confidence in the wet.
You can see examples of non-slip finishes in the Pool & Garden Spaces gallery and explore more design ideas in the Daily Landscaping & Kerb Appeal News.
Is resin more expensive than paving or asphalt alternatives?
In terms of initial outlay, a resin bound driveway usually costs more per square metre than basic concrete, standard asphalt or entry-level block paving. However, when you factor in reduced maintenance, better drainage and improved kerb appeal, the long-term value is often higher.
| Surface type | Typical UK guide price per m²* | Maintenance & lifespan notes |
|---|---|---|
| Basic asphalt / tarmac | Lower initial cost, often in the £40-£70 per m² band. | Can crack, rut and fade, may need patch repairs and resurfacing over time. |
| Standard block paving | Varies widely by block type, complexity and base build. | Joints can move, weeds and moss can establish, sand and levelling often needed. |
| Resin bound surfacing | Typically from around £80 per m² for simple overlays up to £140+ per m² for full base builds and heavy use areas. | Designed for 15-25 year lifespans with very low day-to-day upkeep when installed correctly. |
*These figures are broad UK guides for comparison only. Your exact quote will reflect access, excavation, base build, design and location.
If you are weighing up the cost of a resin bound driveway against block paving, gravel or asphalt, the best next step is to arrange a Resin Surfacing Assessment so your project can be priced accurately and different options affect the budget can be explained.
You can also browse real-world driveway examples and layouts on the Driveways & Entrances page and keep up with ideas and trends through the Kerb Appeal & Landscaping News.
What causes cheap resin surfaces to crack, fail or discolour?
Most resin driveway horror stories have the same ingredients: poor base build, cheap materials and rushed installation. The resin layer can only perform as well as the structure beneath it.
Common causes of premature failure include:
- Non-dried or dusty stone aggregates that weaken the bond
- Low quality or non UV-stable resins that amber, chalk or become brittle in sunlight
- Insufficient resin content, leaving the stone under-bound
- Incorrect mixing ratios or rushed mixing time on site
- Inadequate sub-base depth or poor compaction leading to movement and cracking
Premium UV-stable polyurethane resins are used on your resin surfacing project. Aggregates are washed and kiln-dried and controlled mixing procedures gives a blend proven durable for British weather conditions. Every installation team follows a consistent base build specification set out in Resin Installation Process.
You can review the approach in more detail in the Quality & Assurance Standards and browse technical guides, aftercare sheets and colour advice in the Homeowner Resources library.
How smooth or rough is the finish and is it slippery when wet?
A standard resin bound finish is smooth but not shiny. You can walk on it comfortably in bare feet, yet the natural texture of the stone gives a reassuring level of grip. For most driveways, patios and paths this standard finish is more than adequate, even in typical British rain.
Where extra safety is desirable a fine anti-slip broadcast can be added during installation. This introduces tiny grip points without spoiling the look of the surface. It is especially useful for:
- Shallow ramps and gentle slopes
- Steps and landings
- Outdoor kitchens and bar areas
- Pool surrounds and spa walkways
To see how this translates in real projects, explore the Pool & Garden Spaces and the wider project imagery in the Cherry Home Improvements Gallery.
London-Specific Resin Surfacing FAQs
Why are homeowners in London switching to resin?
Across London, from Bromley and Richmond to Walthamstow and Wimbledon, many homeowners are replacing tired tarmac and sinking block paving with resin-bound surfacing because it solves several long-standing driveway and patio problems in one go.
A properly installed resin-bound driveway or patio gives you:
• Permeable surfacing that allows water to drain through instead of pooling on top
• A smooth, firm finish that is kinder on tyres, prams, wheelchairs and bare feet
• Far fewer weeds compared with block paving joints
• Better colour stability when a UV-stable resin system is used
• Cleaner, more modern kerb appeal without losing the warmth of natural stone
London also sees sharp swings in weather, heavy rain, cold snaps and summer heat in the same season. Traditional surfaces struggle with this movement. Our London Resin Installation Process is designed to cope with local ground conditions and traffic so the finished surface stays flatter for longer.
Want to see real homes, not showroom shots? Explore project inspiration at See what is possible with resin surfacing.
Are there planning rules for resin in conservation areas across London?
In most London conservation areas, the focus is usually on appearance, levels and drainage rather than on resin as a material. In many cases you will not need separate planning permission to replace an existing driveway with a permeable resin-bound surface laid on a suitable sub-base that allows water to soak away on your land rather than into the road.
There are, however, some important points to bear in mind:
• If your home is listed, any visible change to surfacing, boundary walls or steps may need consent
• Altering levels at the front of the property can trigger questions about damp proofing, access and drainage
• Non-permeable surfacing that pushes water into the highway drains is treated very differently from permeable systems
During your survey we look at the streetscape, existing materials and falls, then recommend a resin specification that respects the character of the area and aligns with SuDS-friendly practice. It is also sensible to check current guidance with your local planning authority, particularly for listed buildings and tighter conservation streets.
Want a professional eye on it before you commit? Request a detailed review through the Surfacing Assessment form and you will be talked through the options.
What resin options suit period homes in London?
For period properties across London, the key is a natural, understated resin blend that works with brick, render, stone detailing and roof tones rather than fighting them. Done well, resin can feel like it belongs, not like a modern overlay.
Typically, the best-fitting options are:
• Warm buffs, honey and barley mixes that echo traditional gravel without the loose stones
• Softer greys and oatmeals that sit well with painted timber, older brickwork and stone sills
• Stone sizes that feel comfortable underfoot yet look refined at the front of a character home
During a design visit, resin samples are matched against brick, windows and doors in natural daylight. This sample matching is built into the London Resin Installation Process rather than left to guesswork or catalogue photos.
Need ideas that look more “period home” than “car park”? Browse examples in See what is possible with resin surfacing.
Is resin suitable for clay-heavy ground common in parts of London?
Yes, resin-bound surfacing can perform very well on clay-heavy ground provided the sub-base is designed correctly. Clay is treated as the sub-grade, and a stable, free-draining base is engineered above it to spread loads and manage water.
On clay-heavy plots the approach typically includes:
• Excavating to the required depth and removing weak or made-up fill
• Installing and compacting an open-graded Type 3 or similar sub-base to spread the load
• Shaping levels and falls so water moves through the resin and base rather than sitting on top
The resin-bound layer then sits on this engineered base, giving a stable, permeable finish that handles vehicle traffic and London weather without the surface breaking up in dry spells.
Not sure what sits under the existing drive? Use the Surfacing Assessment and the build-up can be reviewed before recommending a specification.
Do you install across Greater London and the surrounding commuter belt?
Yes. Resin teams regularly work across Greater London and nearby areas where access, parking and permits can affect logistics. If your postcode is within Greater London, there is a strong chance work is already carried out nearby.
Each project is planned around:
• Access for mixers and materials on tighter streets and shared drives
• Neighbourhood parking, loading restrictions and permits where required
• Local ground conditions, including clay-heavy plots and sloping sites
If you are unsure whether your property sits in the core area, send your postcode when requesting a quote and coverage can be confirmed along with likely timelines.
Ready to check coverage? Share details on the Surfacing Assessment form and availability can be confirmed.
What lead times are available for London projects?
Lead times move throughout the year, but as a guide most London resin projects are installed within a window of a few weeks once the design and specification are approved. Smaller pathways and resurface jobs can often be scheduled sooner than full driveway rebuilds that involve more groundworks.
The main factors that affect dates are:
• Time of year and existing bookings in the diary
• How much preparation is needed before the resin-bound layer is installed
• Weather conditions, as resin needs a dry window and suitable temperatures to cure properly
During the quotation a realistic target week can be given and the steps explained, such as clearing the driveway or moving vehicles. The Quality Assurance approach includes managing bookings properly so the team can focus on doing a meticulous job on the day.
Working to a hard deadline like a house sale or event? Mention it on the Surfacing Assessment and what is realistic can be confirmed.
Can you match resin to London brick and heritage-style colour palettes?
Yes. Colour matching is one of the most important stages when working with London’s mix of Victorian terraces, Edwardian semis and period cottages on the edges. A curated range of resin-bound stone blends covers everything from soft flint tones to warmer London stock brick palettes, then it is fine-tuned on site.
During a design visit the process typically includes:
• Holding physical resin samples against brickwork, render and the roof line
• Checking how the colour behaves in shade and sunlight at the front of the property
• Considering boundary walls, gates, garage doors and any planned paint changes
The aim is not a perfect match, which can look flat, but a blend that ties the elevation together and makes the frontage feel intentional and settled.
Want to see how subtle tone shifts change kerb appeal? Browse examples in See what is possible with resin surfacing.
What’s the best resin choice for exposed, high-traffic London entrances?
Busy London entrances benefit from a high-quality UV-stable resin system paired with hard-wearing aggregates, plus a build-up designed for frequent vehicle turning and footfall. Road dust, pollution film and constant use all put extra demands on a driveway or front path.
For these homes a typical specification includes:
• UV-stable polyurethane resin to protect against yellowing and chalking
• Blends that disguise everyday street dust between cleans
• Slip-resistant finishes appropriate for slopes, steps and shared access routes
The installation framework is set out in the London Resin Installation Process, supported by Quality Assurance checks so each project is mixed and laid to the correct ratios and depths for long-term performance.
On a busy road, near a school run or with tight turning? Mention it on the Surfacing Assessment form so the specification can be matched to real-world use.
Is resin ideal for narrow access sites like London terraces?
Resin-bound surfacing works well on many terraced streets across London where access is tight and parking is at a premium. The key is the planning. Resin and stone are mixed on site in compact forced-action mixers, then brought into position by barrow or bucket, which suits narrow side paths and shared alleys.
For tight access projects the focus is on:
• Agreeing drop points that minimise disruption to neighbours
• Protecting internal or shared routes while moving materials and equipment
• Designing levels to minimise door thresholds and trip points on finished areas
Resin-bound surfacing is also relatively slim in build-up compared with some traditional options, which can help where there is limited room to lower existing levels.
Worried the layout is “too awkward” for resin? Upload photos when requesting a Surfacing Assessment and access can be reviewed before visiting.
Do London gardens require extra drainage or soakaway preparation?
Many London gardens cope perfectly well with a correctly built permeable resin-bound system that allows water to pass through into a free-draining sub-base. In these cases, additional soakaways or channels may not be needed because the surface is designed to work with rainfall rather than against it.
There are situations, however, where extra drainage design is sensible, for example:
• Very large driveways where most of the front garden becomes hard landscaping
• Plots with heavy clay, known standing water issues or a high water table
• Properties that slope towards the house rather than away from it
As part of the London Resin Installation Process, falls, soil type and existing drainage are assessed, then suitable options are recommended. This can include permeable build-ups, discreet channels or soakaway improvements carried out in line with current good practice.
Drainage is not the glamorous part of a new driveway, but it is the critical part. The Quality Assurance standards ensure the agreed drainage plan is followed on site, so the finished surface is designed to look good on day one and handle London weather for years to come.
Resin Driveway FAQs
How long does a resin driveway installation take from start to finish?
A typical family resin bound driveway often takes around two to four working days on site from first dig to final finish. Time changes with size, base condition and the British weather.
| Project type | Typical working days* | What usually happens |
|---|---|---|
| Small overlay on sound tarmac or concrete | 1–2 days | Clean, prime and lay the resin bound layer in one visit. |
| Average driveway with light prep | 2–3 days | Local repairs, level checks, then a single resin pour. |
| Full dig out and new base | 3–5 days | Remove old drive, build new base, add drainage, then lay resin. |
*Guide only. Exact time depends on access, weather, layout and base condition.
For a clear driveway build process:
Resin Installation Process – full driveway build guide
For a time estimate based on your own drive photos and rough size:
Resin Surfacing Assessment – upload photos for a tailored plan
How thick should a resin bound driveway be for cars and everyday use?
For normal family cars and light vans, a resin bound driveway is usually laid at around 18–20 mm thick. This sits on top of a strong stone base that takes most of the load.
| Use | Typical thickness | Notes |
|---|---|---|
| Paths and patios | Around 15 mm | Light foot traffic only, on a firm base. |
| Standard family driveway | Around 18–20 mm | Everyday cars and light vans, on open graded stone. |
| Heavier or frequent vehicles | 20 mm or more | May need deeper base and stronger design. |
The resin layer is only one part of the system. The build also needs:
- A well compacted stone sub-base at the right depth.
- Any binder or base course where the design calls for it.
- Correct resin and stone ratios for the traffic level.
For diagrams and base build notes:
Base build and application data sheets – driveway structures
For a thickness check on an existing driveway:
How soon can someone walk or drive on a new resin driveway?
Resin bound driveways cure quite quickly, but need enough time to harden fully. As a simple guide:
- Walking – often safe after around 24 hours.
- Parking normal cars – often safe after around 48 hours.
| Use | Typical time after install* | Things to avoid |
|---|---|---|
| Walking | Around 24 hours | Do not drag heavy pots or sharp objects across the surface. |
| Parking cars | Around 48 hours | Avoid hard steering on the spot and heavy plant or skips. |
*Each driveway gets its own care note based on resin type, temperature and layout.
For simple aftercare sheets and cleaning advice:
Can resin be laid over an existing driveway surface?
A resin bound driveway can often be installed as an overlay on top of an existing surface. This works best when the current drive is strong and drains properly, but just looks tired.
| Existing surface | Overlay usually possible? | Key checks first |
|---|---|---|
| Sound tarmac or asphalt | Often yes | No soft spots, no big cracks, no standing water. |
| Good concrete | Often yes | Cracks and joints need repair, levels need checking. |
| Block paving | Sometimes | Movement, sinking and weeds must be dealt with first. |
| Loose gravel or broken slabs | Rarely | Usually cheaper long term to dig out and rebuild. |
An overlay suits a driveway that behaves well but has an untidy finish. A drive that is cracked, sinking or holding water normally needs a full base rebuild.
For a step-by-step look at overlays and full base builds:
Resin Installation Process – overlays vs new base
For a yes or no on a specific driveway surface, with photos:
Resin Surfacing Assessment – is an overlay right for this drive?
How long does a resin driveway last and what maintenance is needed?
A well built resin bound driveway, using UV stable resin and a proper base, can often last around 15–25 years. Care is simple and fits into normal garden jobs.
| Task | How often | Why it matters |
|---|---|---|
| Sweeping leaves and soil | Weekly in busy seasons | Stops moss and keeps the resin surface clean. |
| Light pressure wash | A few times a year | Lifts dirt and brings back the stone colour. |
| Spot clean spills | As needed | Reduces the chance of oil or food stains. |
For full aftercare instructions and colour charts:
Aftercare, colour and photo guides – resin driveway care
For help with outside cleaning and refresh work:
Is a resin driveway suitable for slopes, turning areas and heavy use?
Resin bound surfacing works very well on slopes, turning circles and shared driveways when designed correctly. The build can be tuned to match the way the space is used.
A good design for busy or sloping driveways will usually:
- Use the right stone depth and resin mix for higher loads.
- Include a strong base with correct depth and compaction.
- Add a fine anti slip finish on the steeper parts.
For technical notes and build details:
Technical info and downloads – resin driveway specifications
To see sloping and high traffic driveways in real streets:
Do resin driveways comply with SuDS and driveway drainage rules?
A true resin bound driveway laid on an open graded stone base is usually a permeable surface. Rain water can pass through and soak into the ground rather than running straight into the road.
For any front driveway upgrade, it is wise to think about:
- Where water goes now during heavy rain.
- Soil type and whether the garden drains freely.
- Any local rules for paved areas in the street.
National guidance on front garden paving and permeable driveways:
Planning Portal – permeable front garden paving rules
GOV.UK – guidance on permeable surfacing of front gardens
For local design thinking and drainage planning:
Can borders, patterns or emblems be added to a resin driveway?
Resin bound driveways are very flexible in design. Borders, bands, contrasting aprons and even simple emblems can be built into the surface using different stone blends or set in details.
Popular ideas for driveway design include:
- A darker main driveway with a lighter border that frames parking bays.
- Borders that line up with brick walls, steps or front path edges.
- House numbers, small logos or shapes set into the resin at the entrance.
For driveway inspiration that shows borders and patterns:
Driveways and Entrances – resin border and pattern ideas
For digital mock ups, pattern ideas and a preview of designs before work starts:
ResinVision™ Studio – see driveway designs before installation
For finishes, blends and options to add emblems or motifs:
Choose My Finish – borders, emblems and resin blend options
Request a free resin sample pack – up to six blends to test at home
How much does a resin driveway cost compared to other surfaces?
A resin bound driveway often starts from around £80 per square metre for basic surfacing on a suitable base. For heavier duty designs with full base structures, depths and detailing, prices can rise to around £140 per square metre or more.
| Driveway type | Typical cost band (guide) | Key points |
|---|---|---|
| Loose gravel | Lower | Cheaper to lay, needs topping up, can spread and rut. |
| Tarmac | Lower to mid | Simple look, can crack or soften in heat over time. |
| Block paving | Mid to higher | Neat finish, joints can move and grow weeds. |
| Resin bound driveway | Around £80–£140+ per m² | Smooth, low maintenance, permeable and custom by design. |
Guide bands only. Groundworks, drainage, steps and walls change any driveway price.
For deeper reading on costs, options and planning:
Help and Advice – resin driveway guides and cost explainers
For a written quotation based on a real property:
Resin Surfacing Assessment – request a tailored driveway quote
Will a resin driveway improve the look and value of a home?
A neat resin bound driveway can give a big lift to kerb appeal. Clean, modern surfacing at the front of a house often makes the whole home feel fresher and more cared for.
Estate agents often notice that a good driveway:
- Creates a strong first impression from the road.
- Makes parking feel simple rather than stressful.
- Frames planting, steps and the front door in a better way.
For real before-and-after examples in streets:
Driveways and Entrances – before and after kerb appeal
See What is Possible – resin surfacing inspiration gallery
For driveway design ideas, trends and kerb appeal tips each month:
Resin Surfacing News – landscaping and kerb appeal topics
For a digital preview of how a resin driveway might look in front of a specific home:
ResinVision™ Studio – preview a new driveway before saying yes
Resin Patios & Pathways FAQs
Are resin patios comfortable for barefoot areas like gardens, terraces or poolside spaces?
Yes. A resin-bound patio has a smooth, stone-like finish that feels gentle under bare feet. The stones are locked into a clear binder, so there are no loose chippings or sharp slab edges.
The surface stays firm and even, helping chairs, loungers and paddling pools sit level. On a suitable base, a permeable resin system also allows rain to drain through the structure rather than pooling on top.
| Surface type | Barefoot comfort | Weeds & joints |
|---|---|---|
| Resin-bound patio | Smooth, gentle, light grip | No open joints in the surface layer |
| Loose gravel | Sharp, moves underfoot | Weeds and ruts common |
| Traditional slabs | Hard joints, lips and ridges | Weeds in joints if not sealed |
Design ideas and real examples sit here:
View Patios & Pathways gallery
For barefoot care tips and cleaning guides:
Can resin be used to replace cracked or uneven garden slabs and stepping-stone paths?
Yes. Resin-bound surfacing is often used to replace cracked slabs, worn flags and stepping-stone paths. The aim is to remove trip points and create one level, free-draining surface.
Before confirming the build, installers usually check:
- How loose or uneven the existing slabs are
- Whether water sits on the surface after rain
- If the base below has moved or degraded
A solid slab base may suit a resin overlay. Where the structure has failed, a full dig-out and new permeable base normally gives the best long-term result.
| Option | Typical use | Time scale |
|---|---|---|
| Resin overlay on sound slabs | Small to mid-size patios with firm bases | Often 1–2 working days |
| Full dig-out and new base | Cracked or sinking areas | Often 2–4 working days, size dependent |
Resin patios often start from around £80 per square metre for straightforward resurfacing. Costs rise where excavation, drainage or deeper bases are required, with complex builds sitting closer to £140 per square metre.
Patio and path transformations sit here:
Explore Patios & Pathways projects
For a clear breakdown of resin costs:
Resin surfacing costs and planning guides
Base-build and application notes:
Is a resin patio slippery when wet or during winter?
Resin-bound patios have a fine, even texture. The exposed stone gives natural grip, while the permeable structure helps water drain away rather than pooling on the surface.
In shaded or high-use areas, a clear anti-slip additive can be worked into the surface during installation. This bonds into the resin and does not wash away.
- Outdoor kitchens and BBQ areas
- Pool and hot tub surrounds
- Steps, ramps and north-facing paths
Slip-resistant finishes around water and slopes:
View Pool & Garden Spaces inspiration
Technical notes and surface guidance:
Can you create curved paths, garden zones or seamless transitions with resin?
Resin-bound surfacing is laid by hand, allowing it to follow curves and organic shapes. This makes it ideal for flowing garden paths, seating zones and smooth transitions between driveways, patios and lawns.
Popular layouts include:
- Curved paths linking terraces to lawns and play areas
- Seamless routes from driveway to side access and rear patios
- Central entertaining spaces with fire pits or outdoor dining
Features such as inlaid numbers or subtle design markers can run through garden spaces, creating a joined-up look across the whole property.
For layout ideas and inspiration:
To preview a resin layout before work starts, use:
Does a resin patio need a different base than a resin driveway?
The principles are the same. Both patios and driveways need a stable, well-compacted, free-draining base. The difference is depth and strength. Driveways are designed for vehicles. Patios are designed for people, furniture and garden features.
| Area | Base aim | Typical focus |
|---|---|---|
| Resin driveway | Carry regular vehicle loads | Deeper sub-base, turning strength |
| Resin patio/path | Stay level under foot traffic | Drainage, soil stability, local reinforcement |
Soil type, old hardstanding and heavy features such as hot tubs or outdoor kitchens may require extra depth or reinforcement in specific areas.
Full base-build guidance:
How do resin patios cope with furniture, fire pits or outdoor kitchens?
Resin-bound patios comfortably support everyday furniture, planters and dining sets. Loads spread evenly across the surface, helping items sit flat rather than sink or rock.
For heavier features:
- Use pads beneath narrow feet
- Place fire pits on stands or heat shields
- Design reinforced base zones under outdoor kitchens
Zoning with different stone blends can define cooking, dining and seating areas without breaking the surface into multiple materials.
Zoned garden layouts and pool areas:
View Pool & Garden Spaces ideas
Long-term care advice:
Patio aftercare and stain-removal guides
Need a proper refresh when outdoor living season hits:
Will weeds grow through a resin patio or garden path?
Weeds do not grow up through a resin-bound patio or path when installed correctly. The surface forms one continuous layer with no open joints.
Any growth usually comes from wind-blown seeds settling on surface dust, or from roots creeping in at the edges.
| Task | How often | Why it helps |
|---|---|---|
| Sweep leaves and debris | Every few weeks | Removes seed build-up |
| Gentle jet wash | A few times a year | Refreshes the surface |
| Trim edges | As needed | Stops root spread |
Weed-resistant pathway examples:
Care checklists and downloads:
If the surface needs a deep clean after leaf drop:
Can resin paths help make a garden more wheelchair or pram friendly?
Yes. Resin-bound paths are firm, level and free from loose stones, making them suitable for wheelchairs, prams and mobility aids.
Accessible designs usually focus on:
- Comfortable path widths
- Gentle gradients where possible
- Flush thresholds at doors and gates
- Anti-slip finishes in shaded areas
Linked driveway, patio and garden routes:
Technical guidance and planning notes:
Do resin patios need special drainage or soakaway planning?
Resin-bound patios laid on free-draining bases are permeable systems. Rainwater passes through the surface rather than running off into drains.
Extra drainage planning may be helpful where:
- Large areas of hard landscaping are present
- Soil is heavy clay or slow-draining
- Ground slopes towards buildings or boundaries
Permeable designs often support SuDS principles and can reduce planning complications when installed correctly.
Drainage and build-up guidance:
How long does a resin patio last and what upkeep is involved?
A well-built resin patio typically lasts around 15–25 years, depending on use, design and care. The same structural principles used for resin driveways sit beneath patios, just tailored for lighter loads.
Day-to-day upkeep is simple:
- Sweep leaves and loose material
- Use a gentle jet wash a few times a year
- Clean spills promptly
Detailed care and cleaning guidance:
Each month, a fresh topic on patios, landscaping and kerb appeal appears here:
Resin Pool & Garden Spaces FAQs
Is resin suitable around pools, hot tubs and spa areas?
Yes. Resin-bound surfacing works very well around pools and spa areas. It feels comfortable under bare feet and the natural stone texture provides grip when wet, especially when the correct resin system and aggregates are specified for splash zones.
For pool and spa areas, an installer will usually specify:
- UV-stable resin to keep colours steady in strong sunlight
- A fine anti-slip broadcast into the top surface for wet areas
- A permeable, free-draining sub-base so water moves away quickly and does not pond
For visual ideas and layout inspiration, see Pool & Garden Spaces projects:
Pool & Garden Spaces – real-world examples
For a deeper dive into resin materials and base build-ups:
How does resin perform with constant water exposure or splash zones?
Resin-bound surfacing is designed to cope with regular water exposure. When laid as a permeable system, splash water drains through the resin and stone into the base below rather than sitting on top.
This brings practical benefits in splash zones:
- Less standing water compared with many tiles or smooth concrete
- Lower risk of algae build-up in joints, because there are no open grout lines
- Faster drying times, so the surface feels safer under bare feet
| Surface type | Drainage | Typical wet-zone behaviour |
|---|---|---|
| Resin-bound (permeable) | Water passes through into the base | Good grip when specified with correct aggregates and anti-slip finish |
| Ceramic or porcelain tiles | Water sits on top until directed to channels | Can be slippery unless a textured outdoor tile is used |
| Textured concrete | Mainly impermeable; relies on falls and drainage | Reasonable grip when new, can become slippery if algae builds up |
For pool and spa layouts that mix resin with planting, decking or paving:
Can resin be used for garden offices, outdoor studios or commercial cabins?
Yes. Resin-bound surfacing works well around garden rooms, home offices, studios and small commercial cabins. It creates a smart entrance and reduces mud, ruts and loose stones in regular footfall areas.
Typical uses include:
- Paths leading to a garden office or therapy room
- Outdoor seating or meeting terraces
- Forecourts for salons, studios or workshop cabins
- Slip-resistant entrances for commercial garden buildings
For examples of resin used around patios, paths and multi-use gardens:
Resin Patios & Pathways – garden office and terrace ideas
Pool & Garden Spaces – multi-use gardens
Is resin safe for steps, slopes and shaded garden areas?
Resin-bound surfacing can provide good grip when the correct stone size and anti-slip finish are specified. This is particularly helpful on shaded routes, steps and slopes where surfaces stay damp for longer.
Anti-slip finishing is especially useful on:
- North-facing paths that stay damp in winter
- Steps around decking, pods and cabins
- Slopes leading from driveways into garden courtyards
- Poolside steps and platforms
The texture is subtle rather than industrial. Fine particles are broadcast into the surface during laying, then locked into the resin as it cures.
For examples of resin on slopes, steps and shaded garden spaces:
Can resin be shaped for curved pool edges, garden borders or organic designs?
Yes. Resin-bound surfacing is hand-trowelled, so it can follow curves and organic outlines. This suits free-form pool edges, sweeping garden paths, circular seating areas and flowing borders around planting.
Popular design ideas include:
- Soft, curved pool surrounds without harsh corners
- Circular or oval seating terraces around a firepit
- Resin paths that weave between planting beds
- Contrasting colour bands that separate zones in one seamless pour
Slabs and rigid paving often need multiple cuts to create curves, which can interrupt the look of a design. Resin allows smooth shapes with continuous colour instead.
For inspiration on curves and mixed layouts:
Do pool and garden resin areas need special drainage or soakaway planning?
Many resin pool terraces, paths and garden areas work well with a standard permeable build-up. Water moves through the resin and stone into the sub-base, then filters into the ground, helping reduce pressure on traditional drainage.
Extra drainage design is sensible where:
- The terrace or courtyard covers a large proportion of the garden
- The soil is heavy clay or known to hold water in winter
- The space slopes towards buildings, cabins or pool rooms
In these cases, levels, soil type and existing drains should be reviewed before choosing options such as discreet channels, small soakaways or deeper permeable bases.
For guidance on base build-ups and drainage design:
Base build and application data sheets
Technical information and downloads
How durable is resin for outdoor buildings, heavy footfall and mixed-use spaces?
Resin-bound surfaces tend to offer a long service life when laid on a suitable base using UV-stable resin. The same strengths that suit driveways and entrances also apply to garden terraces, paths and mixed-use outdoor areas.
Resin is particularly well suited to:
- Forecourts for garden offices and studios
- Outdoor service areas and small commercial entrances
- Seating terraces and entertaining spaces
- Play zones, home gyms and mixed-use garden rooms
The seamless finish avoids loose stones and open joints, reducing trip points and weak spots along grout lines.
For long-term care, downloads and guidance:
Homeowner Resources – free downloads
Aftercare, colour and photo guides
If the garden space needs a seasonal deep clean:
What maintenance is needed for resin pool surrounds and garden spaces?
Day-to-day care is simple. Resin-bound surfacing has no open joints and no loose gravel, so routine maintenance is mainly about keeping the surface clear of debris and rinsing away residues.
Routine care usually looks like this:
- Sweep away leaves and organic debris
- Occasionally jet wash on a fan setting to refresh the finish
- Clean sunscreen, food and pool chemical spills as soon as possible
A seasonal check is a sensible habit, especially where resin sits alongside pools or outdoor kitchens:
- Check drainage channels and gullies are clear
- Look for damage from planters, furniture or heavy items
- Rinse away any salt or de-icer from adjacent paths
For detailed care instructions and printable checklists:
Resin Aftercare Guides and Checklists
If you want the garden space brought back to showroom levels:
Resin Installation FAQs
What happens during a resin-bound installation from start to finish?
A resin-bound installation follows a clear, step-by-step process. The aim is simple, a strong base, a permeable build-up and a smooth, even resin finish that lasts for many years.
The overall method is set out in:
Resin Surfacing Installation Process – full installation framework
A typical installation looks like this:
- Careful survey and design, with levels and drainage checked in advance
- Excavation and safe removal of old surfacing and weak material
- Installation and compaction of a free-draining sub-base to the right depth
- Binder or base layer added if the layout or traffic load needs extra support
- UV-stable resin and kiln-dried stone mixed in a forced action mixer on site
- Resin-bound mix laid in one go and hand-trowelled to a seamless finish
After the last trowel pass, the surface is left to cure. Clear timings are then given for walking, parking and general use so the driveway, patio or path can harden properly.
For a deeper look at each stage, including base build diagrams and data sheets:
Base build and application data sheets
Technical information and downloads
Ready for a project plan that fits a real home?
How important is the base and what type is used for resin surfacing?
The base is the most important part of any resin-bound installation. The resin layer is the visible part, but the sub-base carries almost all of the structural load. A weak base means movement, cracking and dips, no matter how good the resin mix is.
For most driveways, patios and paths the build-up includes:
- An open-graded, free-draining sub-base, often Type 3 stone
- A binder or base course where higher loads or traffic are expected
- Geotextile membranes where the soil needs extra control
| Layer | Main job |
|---|---|
| Resin-bound surface | Smooth, permeable, decorative finish |
| Binder or base course | Spreads loads and adds stiffness where needed |
| Sub-base | Takes the main weight and supports drainage |
Base depth, compaction and drainage need to match the soil type and expected traffic:
The Resin Installation Process – base build standards
For homeowners who like detail:
What weather conditions are needed for a successful resin installation?
Weather has a big effect on resin-bound surfacing. Resin does not like rain, standing water or very low temperatures. Moisture in the mix or on the base can cause clouding, weak spots or a poor bond.
Typical conditions are:
- Dry weather while the resin and stone are mixed and trowelled
- A base that is dry and free from frost and surface water
- Air and surface temperatures usually between about 5°C and 25°C
If rain is forecast, or a cold snap arrives, a good installer will delay the pour rather than risk the surface. A short delay protects the long-term life of the driveway, patio or path.
For an overview of installation checks that sit around weather decisions:
How is the resin colour matched to my property on installation day?
Colour is chosen in daylight, on site, using resin-bound samples. Samples are held against brickwork, render, doors, window frames and roof tiles so the blend suits the property rather than feeling like an afterthought.
On installation day, the mixing team will:
- Check each batch of stone for cleanliness and consistency
- Use UV-stable resin to help protect against yellowing over time
- Follow fixed resin-to-stone ratios so each batch stays consistent
This helps avoid patchy areas and visible bands across the finished surface.
For blend ideas and layout inspiration:
See what is possible – resin inspiration gallery
Order a resin sample pack – up to 6 blends to test at home
Why does a resin driveway, patio or path need one continuous pour?
Once resin and stone are mixed, the curing clock starts straight away. If work stops part way through and then restarts later, a visible line can form where the two mixes meet and that line may become a weak point.
A continuous pour helps avoid:
- Cold joints and visible seams
- Colour shifts between early and late batches
- Areas that wear at different rates
This is why a resin installation often uses several people working at the same time, sometimes with more than one mixer running. The surface is treated like one piece, not a patchwork.
For more on mix ratios, curing windows and site control:
How are access, parking and disruption managed during installation?
A good resin project starts with a clear plan for access and parking. This keeps disruption low and helps protect shared routes, pavements and entrances.
A typical plan covers:
- Where vehicles will park during the work
- Where mixers and materials will sit while the resin is laid
- How barrows or buckets will move through side paths or shared alleys
- What protection is needed for floors, walls and doorways on access routes
On tighter streets, smaller vehicles or more manual handling may be used so neighbours can still get in and out. Clear timescales and a simple site layout sketch help everyone know what to expect.
For an outline of how installation standards link with site planning:
What quality checks take place during and after a resin installation?
A strong resin surface comes from lots of small checks, not one big inspection at the end. Installers typically follow a simple list of measures at each stage.
Typical checks include:
- Verifying excavation depth and sub-base thickness
- Checking compaction before moving on
- Confirming the base is dry enough for resin
- Recording resin and stone quantities for each batch
- Spot-checking finished thickness across the surface
- Final checks for trowel marks, level changes and tidy edges
These checks sit inside a wider quality system so that every driveway, patio or path follows the same standard.
Full details are set out in:
Quality Assurance – resin installation standards
For homeowners who want the bigger picture, the Knowledge Hub brings the main guides together:
What should be done to prepare the home before the installation team arrives?
Preparation is simple, but it makes the day run far more smoothly.
Before the team arrives, it helps to:
- Move vehicles off the driveway or work area
- Clear garden furniture, pots and ornaments from the surface zone
- Keep pets and children away from the site during working hours
- Let neighbours know if access may be tight for a short time
- Confirm gate codes, alarms or access notes in advance
It can also help to agree where materials can be unloaded and whether an outside tap is available. This avoids last-minute decisions.
A tailored preparation list is usually provided once a design and quote are agreed. To start that process:
Book a Resin Design Assessment and site review
Ask a resin surfacing question that is not covered here
Resin Care & Maintenance FAQs
How should a resin-bound driveway, patio or path be cleaned and maintained?
Resin-bound surfacing is one of the easiest outdoor finishes to look after. The surface is smooth, joint-free and permeable, so dirt sits at the surface rather than hiding in gaps. Most resin driveways, patios and paths stay looking smart with simple, regular care.
Basic resin maintenance usually includes:
- Light sweeping to clear leaves, soil and grit
- Occasional jet washing using a fan nozzle
- Removing moss or algae before it takes hold
- Cleaning spills and marks as soon as they appear
A step-by-step guide is available to download here:
Resin Care & Maintenance Guide – free homeowner download
Extra resources and aftercare support are listed on the main homeowner hub:
Aftercare, colour and photo guides
Homeowner resources and free downloads
For resin surfaces that need a deeper clean, or for owners who prefer a done-for-you service, a specialist cleaning team can help:
Cherry Cleans – professional resin-safe cleaning
A little regular care keeps a resin driveway or patio looking fresh and helps it last for years.
Can weeds grow through a resin-bound surface?
Weeds do not grow up through a resin-bound surface when it is installed correctly. The stones are fully bound in resin, so there are no open joints like block paving and no loose gravel for roots to grab.
Any growth that appears usually comes from:
- Wind-blown seeds settling on a thin film of dust at the surface
- Roots creeping in from nearby borders
- Moss or algae in damp, shaded corners
To keep a resin driveway, patio or path looking tidy:
- Sweep occasionally to remove leaves and soil
- Trim back planting that hangs over edges
- Lift small surface weeds while they are young
Practical tips for weed control and edge care are included in:
Resin Care & Maintenance Guide
For surfaces that have been left for a while, a professional deep clean can reset everything:
Cherry Cleans – deep cleaning and weed removal for resin-bound surfacing
Can resin surfaces be jet washed safely, and what technique should be used?
Jet washing is safe for resin-bound surfacing when it is done with care. The goal is to lift dirt and organic matter without scouring the stone.
A simple jet wash routine is:
- Use a fan or wide-angle nozzle, not a pencil jet
- Keep the lance about 20–30 cm from the surface
- Move in steady, sweeping passes rather than holding one spot
- Rinse the whole area so the finish looks even
Recommended settings and technique are set out in:
Resin Care & Maintenance Guide – jet washing section
For larger areas or busy households, a specialist visit can take care of the heavy work:
What is the best way to remove stains, tyre marks or oil spills from a resin surface?
Most day-to-day spills sit on the top of a resin-bound surface rather than soaking deep inside. That makes stain removal simpler than on block paving or rough concrete.
For light marks:
- Use warm, soapy water and a soft brush
- Rinse with clean water afterwards
For tougher spots:
- Use a gentle degreaser on oil drips
- Scrub tyre marks with warm detergent and a stiff brush
- Finish with a light jet wash on a fan setting
Stain guidance and what to use (and avoid) is covered in:
Resin Care & Maintenance Guide – stain and mark removal
For older surfaces with set-in staining, a professional treatment can often get a better result:
Will a resin driveway or patio fade or change colour over time?
Colour stability depends mainly on the type of resin used. UV-stable, aliphatic resin is designed to resist yellowing and chalking, even in strong sunlight. That helps a resin driveway or patio keep its original tone for a long time.
Long-term colour performance is linked to:
- Use of UV-stable resin at installation
- Clean, kiln-dried stone with no dust coating
- Installation in dry, well-controlled conditions
Gentle cleaning helps the surface stay bright. If an older surface looks dull, it is often just built-up grime rather than true fading:
Cherry Cleans – colour refresh for resin-bound surfacing
Colour care notes and practical tips are included here:
Resin Care & Maintenance Guide – colour and appearance section
Does resin need sealing or topping up over the years?
Resin-bound surfacing does not need sealing or topping up in normal use. The resin and stone are mixed and cured through the full layer, so there is no thin coating on top that peels away.
Long-term care is mainly:
- Regular sweeping
- Gentle jet washing when needed
- Prompt cleaning of oil, food or drink spills
Sealers designed for other surfaces are rarely needed and can spoil the look of a resin finish. The safest approach is the one laid out in:
Resin Care & Maintenance Guide – what to use and what to avoid
If a surface feels tired rather than worn, a deep clean is often enough:
Cherry Cleans – restorative cleaning for resin-bound driveways and patios
How do seasonal weather changes affect resin surfaces throughout the year?
Resin-bound surfacing is built to cope with year-round British weather. It is flexible enough to handle normal ground movement and strong enough for daily use in all seasons.
Typical seasonal effects:
- Winter – a permeable build-up can help reduce standing water and ice patches
- Spring – a light clean removes winter grime and early algae
- Summer – UV-stable resin helps protect against colour change
- Autumn – sweeping leaves helps prevent staining and keeps drainage working
Seasonal care tips and a simple checklist appear in:
Resin Care & Maintenance Guide – seasonal checklist
If a seasonal service suits the household, external cleaning support can handle the heavier work:
How long can a resin surface last with proper care, and how can cleaning services help?
A resin-bound driveway, patio or pathway can often last 15–25 years or more when installed on a sound base and looked after with simple, regular maintenance. The seamless structure and strong bond between stone and resin help resist cracking, sinking and nuisance growth.
Lifespan is supported by:
- Correct base build and drainage at installation
- Use of UV-stable resin
- Regular sweeping and light jet washing
- Prompt cleaning of spills and stains
A downloadable care checklist brings it all together:
Resin Care & Maintenance Guide – lifespan and upkeep summary
External cleaning support can help keep the surface looking its best by tackling heavy grime, algae and stubborn marks:
Resin Cost & Finance FAQs
How much does a resin-bound driveway, patio or path typically cost?
The cost of a resin-bound driveway, patio or path depends on the size of the area, the base work needed and the design details chosen. Resin often sits in a similar bracket to high-quality block paving or porcelain, but with a smoother, modern finish and simple day-to-day care.
Main factors that shape the price:
- How many square metres need surfacing
- Whether the existing base can be reused or needs excavation
- Resin depth and traffic level (cars, foot traffic or mixed)
- Stone blend and any borders, steps or feature areas
- Drainage changes, manholes and site access
A simple, plain resin driveway usually costs less than a multi-zone design with borders, lighting and feature steps, even at the same size.
For a plain-English guide to pricing:
How much does resin cost? A simple guide for homeowners
To check how a project might fit into a monthly budget:
Home Improvement Loan Calculator
For a tailored estimate based on photos and layout:
Resin Surfacing Design Assessment – free project review
A well-planned resin upgrade can deliver a bigger visual lift than the raw numbers suggest, especially at the front of a home.
Why do quotes vary so much between resin companies?
Quotes can vary because installers do not all build resin in the same way. Differences in base depth, drainage, resin type and aggregate quality can change both the price and the long-term performance of the surface.
Common reasons for big price differences:
- Depth and quality of the sub-base
- UV-stable resin versus non UV-stable resin
- Stone quality, grading and batch consistency
- Size and training of the installation team
- Time allowed for drainage, levels and ground preparation
A helpful checklist of quality points to look for:
Technical & base build resources for resin surfacing
For a wider overview of guidance and resources:
Resin Knowledge Hub – help & advice
A quote that includes the right base and materials often works out better value over time than a lower price that compromises the build.
Is financing available for resin driveways, patios or garden projects?
Many homeowners use finance to spread the cost of a resin driveway, patio or garden project. Options can include staged payments, fixed-term loans or other home improvement finance, depending on the lender and personal circumstances.
Finance can help when:
- Monthly payments feel easier than a single lump sum
- A project needs to be finished before a set date or event
- Extra details are wanted such as borders, steps or lighting
To explore different amounts and terms month by month:
Home Improvement Loan Calculator – plan resin project finance
The calculator helps turn rough ideas into clear numbers, so a resin upgrade is easier to plan and budget for.
What affects the total price of a resin installation the most?
The base build usually has the biggest effect on price. Removing old materials, installing a new sub-base and sorting drainage take the most time and materials. The resin layer is the visible finish, but the groundwork underneath carries most of the cost and almost all of the strength.
Main price drivers:
- Breaking out and disposing of old concrete, tarmac or paving
- Depth and type of the new permeable sub-base
- Extra binder layers on driveways and higher-traffic areas
- Levelling, edging and manhole adjustments
- Steps, borders, curves and complex layouts
To test how changes in project size or cost might affect finance:
Home Improvement Loan Calculator – test different project budgets
Investing in the hidden layers usually brings the best long-term value, because a strong base supports a longer-lived finish.
Is resin more cost-effective long term than paving, concrete or tarmac?
Over the full life of a surface, resin can work out more cost-effective than many alternatives. There are no joints to re-sand, fewer nuisance weeds, less standing water and fewer trip edges. Routine care is simple, which can reduce ongoing costs over time.
Long-term advantages can include:
- Lower weed control and re-levelling costs than block paving
- Improved drainage performance compared with many impermeable surfaces
- A smooth finish that stays smart with light cleaning
- Fewer repairs linked to cracking, movement or lifted slabs
To compare different budgets and repayment ideas over time:
Home Improvement Loan Calculator – compare long-term costs
For older resin surfaces that need a reset rather than replacement, a specialist clean can protect the earlier investment:
Cherry Cleans – deep cleaning for resin-bound driveways and patios
Can a resin driveway increase property value, and how can that justify the cost?
A well-designed resin driveway or front path can lift first impressions and help a home look well cared-for. Clear parking, tidy edges and a smart entrance can support stronger buyer appeal, even before anyone steps through the front door.
Ways a resin upgrade can support value:
- A cleaner, more modern look from the street
- Clear parking layout for cars and visitors
- Low-maintenance surfacing that feels easier to live with
- A joined-up finish between driveway, steps, paths and planting
To explore how project cost and monthly budgeting might look:
Home Improvement Loan Calculator – check potential value uplift
Regular cleaning helps keep the surface looking sale-ready for longer:
Cherry Cleans – maintain kerb appeal with resin-safe cleaning
For ideas from real projects, browse here:
Driveways & Entrances – real home transformations
If you want to see how resin and landscaping work together visually, the main projects gallery is worth a browse:
Compare Resin & Traditional Surfaces FAQs
How does resin compare to block paving for driveways and patios?
Block paving is familiar and flexible, but the joints invite weeds, sand loss and movement over time. Resin-bound surfacing removes those joints, creating a seamless, fully bonded surface that stays cleaner and more stable with far less routine care.
Key differences:
- Resin is permeable, block paving often relies on additional drainage or falls
- Resin has no joints to re-sand or de-weed
- Resin gives a smooth, joined-up look across the whole area
- Paving blocks can rock or sink if the base moves
For a simple side-by-side guide, start here:
Resin vs traditional surfaces – easy comparison guide
To see block paving upgraded to resin on real homes, browse:
Before & after resin transformations
For homeowners wanting a modern, lower-maintenance finish, resin usually wins on both looks and day-to-day ease.
Is resin better than tarmac for driveways and parking areas?
Tarmac is functional and often chosen for budget reasons. Over time it can soften in hot weather, crack in frost and fade to a dull grey. Resin-bound surfacing can deliver stronger kerb appeal, better drainage and a more stable finish when laid on a suitable base.
Practical differences:
- Resin keeps its colour for longer, tarmac tends to fade
- Resin gives grip without loose chippings
- Resin is permeable, which helps reduce puddles
- Tarmac patches and edges often stay visible after repairs
The build-up that sits under a high-performing resin surface is explained here:
Resin Installation Process – how resin bases are built
For a wider comparison between resin and other common driveway surfaces:
Where tarmac focuses mainly on function, resin adds long-term visual lift as well as everyday performance.
How does resin compare to gravel driveways?
Loose gravel gives a classic look but moves constantly, forms ruts and throws stones into beds, pavements and garages. Resin-bound gravel keeps the natural stone look but locks the stones into place, so the surface stays level and easier to live with.
Main differences:
- Resin does not migrate or need regular topping up
- No deep tyre ruts or channels forming over time
- No loose stones to damage shoes, tyres or indoor floors
- Better access for pushchairs, wheelchairs and bikes
Many homeowners also want to understand the difference between resin-bound and resin-bonded stone:
Resin bound vs bonded gravel – what it really means
For a full comparison against gravel and other surfaces:
Resin vs traditional surfaces – comparison guide
Resin offers the look of gravel with the behaviour of a premium, stable surface.
How does resin perform compared to concrete or imprinted concrete?
Concrete and imprinted concrete are rigid. As ground conditions change, that rigidity can lead to cracks, flaking and visible patch repairs. Resin-bound surfacing is designed with flexibility and permeability in mind, which can help reduce visible cracking and standing water when the base is built correctly.
Comparison points:
- Resin flexes slightly with minor ground movement, concrete does not
- Resin is permeable, concrete usually is not
- No grout or pattern lines to split, stain or trap weeds
- A wide range of stone blends and tones for different house styles
The approach to base build and drainage for resin installations is outlined here:
Resin Installation Process – base build and installation
Extra technical information and homeowner downloads live here:
Homeowner resources – resin guides and downloads
Concrete offers raw strength, and resin adds flexibility, drainage and design control on top of that strength when the base is built properly.
How does resin compare to porcelain patios or outdoor tiles?
Porcelain and outdoor tiles create sharp, modern lines but can feel slippery when wet, rely on grout that discolours and may crack if the base moves. Resin offers a more forgiving surface with natural grip, no grout joints and a softer, stone-like feel underfoot.
Resin vs porcelain highlights:
- Resin can be specified for strong wet-slip resistance
- No grout to stain, crumble or collect moss
- No single tiles to lift, rock or crack
- Stone blends to suit both period and new-build homes
For a wider look at how resin compares with porcelain, slabs, gravel, tarmac and more:
Resin vs traditional surfaces – patio and pathway options
Porcelain delivers crisp geometry, while resin delivers comfort, character and year-round practicality.
What are the biggest advantages resin has over traditional hard landscaping overall?
Resin brings together permeability, strength, accessibility and design flexibility in a single surface. Traditional materials often do one or two of these well, but rarely all of them at the same time.
Standout advantages:
- Seamless, contemporary finish with no joints to fill
- Strong drainage performance, which helps reduce puddles
- Minimal weed and moss issues with basic care
- Comfortable underfoot for everyday and barefoot areas
- A wide choice of blends for classic, coastal or modern homes
For a deeper dive into how resin compares with other surfaces:
Resin vs traditional surfaces – full comparison
If there is still confusion about brochure terms, this clears up one of the most common ones:
Resin bound vs bonded gravel – the real meaning
To see how these choices play out on real properties, visit:
Before & after resin driveway, patio and pathway projects
For homeowners seeking a surface that looks current, works hard and stays tidy with simple care, resin often comes out ahead of older alternatives.
Still deciding?
If you’re comparing options, these quick guides make things clearer and help you choose the right surface with confidence.
Your turn to ask a question...
Can’t find the answer you’re looking for?
Ask directly and get a tailored response from a resin expert. No bots, no guesswork.
And finally - The last of these FAQs...
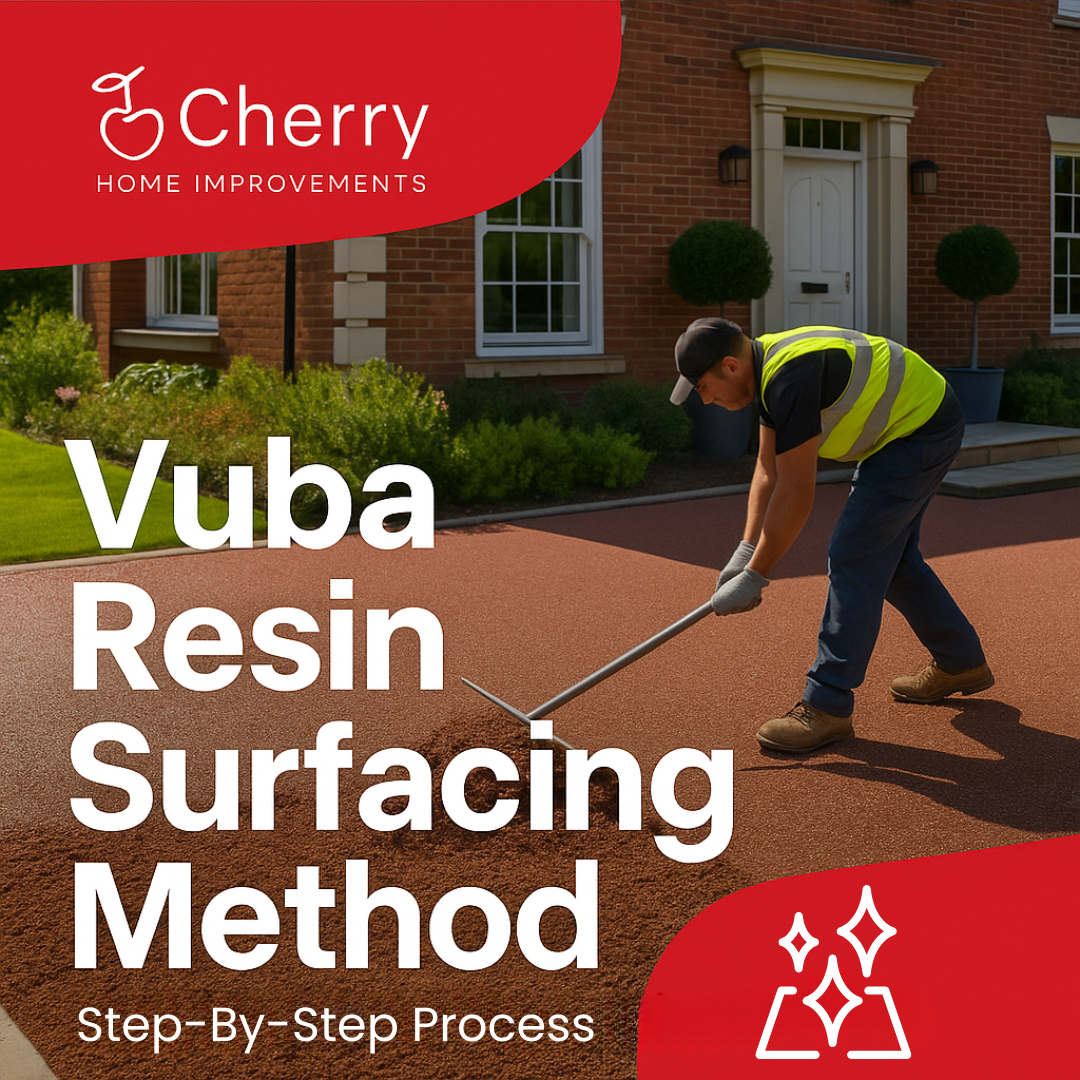
Why Is Vuba Resin the Preferred Option?
Because you want a surface that performs consistently, looks refined and stays low-maintenance for years. The blends used in Vuba installations create a smooth, modern finish that works across the whole property, not just the driveway. Entrances, pathways and courtyard areas all benefit from its seamless appearance and calm, ordered feel. The colour range suits both contemporary and period homes, and the finished surface complements planting, lighting and architectural details with ease. For reassurance on real-world performance and long-term results, the homeowner feedback in the Cherry Home Reviews offers helpful insight into what the experience is like once the resin has been lived with day to day. Taken together, these benefits make Vuba Resin a preferred option for anyone seeking durability, visual harmony and a surface that enhances the approach to the home.
